
Friday, 21 June 2013

Development 30
Sounds! All of the music tracks in the animation were created by myself using Garageband! I used several different intruments, such as Trumpets, Guitars with different effects, Bass with different effects, different Drumsets, Keyboard, Organ, Piano, etc. Here are my composed songs.
Wednesday, 19 June 2013


Tuesday, 18 June 2013
Development 29
Rendering Time! Got myself organised early and started rendering as I was animating to not have trouble with the rendering times. Worked really well.
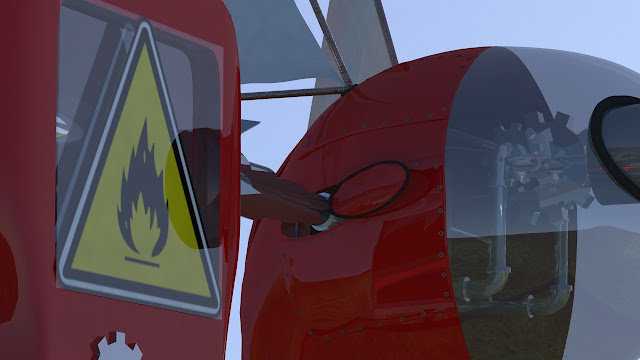
From the notes you can see that I used 30 different camera shots in my animation!


Monday, 17 June 2013


251 - Development
Of course... I didnt just come up with that code, there was a lot of struggle until I got it right but I eventually got the code the way I wanted was ready to move forward in the project.
I created an Illustrator File to laser cut a little box that would have the arduino in it to give it a look of a final product.
Here is a screenshot of the file I created.

I created an Illustrator File to laser cut a little box that would have the arduino in it to give it a look of a final product.
Here is a screenshot of the file I created.

Development 28
A list of all my development scenes.
It was a really good idea to keep all of my stages due to maya unexpected craches! Saved me a few times.
Over 110 scenes

It was a really good idea to keep all of my stages due to maya unexpected craches! Saved me a few times.
Over 110 scenes

Sunday, 16 June 2013
251 - Development
Next step was to incorporate the keys into the buttons so that if I pressed them they would send that Request:
<div id="tv-btns-container">
<form action="index.php" method="get">
<a href="#"><button type="submit" name="tv" class="tv-btns" id="volumeup"
value="volumeup">+</button></a>
<a href="#"><button type="submit" name="tv" class="tv-btns" id="volumedown" value="volumedown">-</button></a>
<a href="#"><button type="submit" name="tv" class="tv-btns tv-mid-btn" id="ligardesligar" value="ligardesligar"><img src="on-off.png"/></button></a>
<a href="#"><button type="submit" name="tv" class="tv-btns" id="channelup" value="channelup"><</button></a>
<a href="#"><button type="submit" name="tv" class="tv-btns last-btn" id="channeldown" value="channeldown">></button></a>
</form>
</div>
Saturday, 15 June 2013
251 - Development
Then I changed the code around so that I could manipulate a TV.
With this code I was able to put the volume up/down change the channels up/down and turn it on/off:
#include <IRremote.h>
IRsend irsend;
void setup()
{
Serial.begin(9600);
}
void loop() {
char readvalue = Serial.read();
if (readvalue == 'q')
irsend.sendNEC(0x20DF40BF, 32);
else if (readvalue == 'w')
irsend.sendNEC(0x20DFC03F, 32);
else if (readvalue == 'l')
irsend.sendNEC(0x20DF10EF, 32);
else if (readvalue == 'e')
irsend.sendNEC(0x20DF00FF, 32);
else if (readvalue == 'r')
irsend.sendNEC(0x20DF807F, 32);
}
251 - Development
After understanding how Xampp works I came up with the following code to send a request with PHP to the port of my computer that was being used by the arduino, and finally, send that "a" key to the arduino serial:
<?php
if ($_REQUEST["tv"] != "")
{
switch ($_REQUEST["tv"])
{
case "volumeup" : $acao = "q"; break;
case "volumedown" : $acao = "w"; break;
case "ligardesligar" : $acao = "l"; break;
case "channelup" : $acao = "e"; break;
case "channeldown" : $acao = "r"; break;
}
$conexaoArduino = fopen("COM4","w");
fwrite($conexaoArduino,$acao);
fclose($conexaoArduino);
}
?>
Development 27
nCloth! Yay! It actually took me ages to understand how it work when you are animating it, but it looked really awesome in the end.


Friday, 14 June 2013
251 - Development
The next step was to use the PHP code to send that key ("a" as my previous example) to my arduino serial so that it would recognise it as the information go get the diode sender going.
For that I had to download a program called Xampp.
It allow me to host my website locally so that I could use PHP to send information to the port of my computer.
It works with Apache:

For that I had to download a program called Xampp.
It allow me to host my website locally so that I could use PHP to send information to the port of my computer.
It works with Apache:

Thursday, 13 June 2013
251 - Development
The Code to send was much simpler.
I tweaked it so that if the arduino serial read a specific key that I pressed (such as "a""), it would send the data collected from the previous code through a infrared sender diode.
Here is a simple example.
This was the code to turn the school's projector On and Off.
#include <IRremote.h>
IRsend irsend;
void setup()
{
Serial.begin(9600);
}
void loop() {
char readvalue = Serial.read();
if (readvalue == 'a')
irsend.sendNEC(0xF20A40BF, 32);
}
Development 27
Third island! The mysterious one. With dead heliots (#sadface) and the twin that flies past heliot.


Wednesday, 12 June 2013
251 - Development
In order to understand how the sending/receiving infrared worked, I had to understand two main coded files offered by external library.
The receiving code required me to have an Infrared receiver that would transform the information received into strings and allow me to copy that data to use it for the sender.
The coded recognised the frequency as well as the decoder such as NEC, Panasonic, R5, R6, etc.
#include <IRremote.h>
int RECV_PIN = 11;
IRrecv irrecv(RECV_PIN);
decode_results results;
void setup()
{
Serial.begin(9600);
irrecv.enableIRIn();
}
void dump(decode_results *results) {
int count = results->rawlen;
if (results->decode_type == UNKNOWN) {
Serial.print("Unknown encoding: ");
}
else if (results->decode_type == NEC) {
Serial.print("Decoded NEC: ");
}
else if (results->decode_type == SONY) {
Serial.print("Decoded SONY: ");
}
else if (results->decode_type == RC5) {
Serial.print("Decoded RC5: ");
}
else if (results->decode_type == RC6) {
Serial.print("Decoded RC6: ");
}
else if (results->decode_type == PANASONIC) {
Serial.print("Decoded PANASONIC - Address: ");
Serial.print(results->panasonicAddress,HEX);
Serial.print(" Value: ");
}
else if (results->decode_type == JVC) {
Serial.print("Decoded JVC: ");
}
Serial.print(results->value, HEX);
Serial.print(" (");
Serial.print(results->bits, DEC);
Serial.println(" bits)");
Serial.print("Raw (");
Serial.print(count, DEC);
Serial.print("): ");
for (int i = 0; i < count; i++) {
if ((i % 2) == 1) {
Serial.print(results->rawbuf[i]*USECPERTICK, DEC);
}
else {
Serial.print(-(int)results->rawbuf[i]*USECPERTICK, DEC);
}
Serial.print(" ");
}
Serial.println("");
}
void loop() {
if (irrecv.decode(&results)) {
Serial.println(results.value, HEX);
dump(&results);
irrecv.resume();
}
}
Tuesday, 11 June 2013
251 - Development
I became in charge of doing the arduino as well as the PHP code.
After taking a few tutorials I found that the best way was to use an external library for the Arduino that enabled me to call methods just for infrared data collection.

After taking a few tutorials I found that the best way was to use an external library for the Arduino that enabled me to call methods just for infrared data collection.

Development 26
So Logan and I swapped projects for an hour or so! He modeled me this awesome looking plane! Thanks Logan!
I added the poster as well the propeller and texture it.
Got the propeller going with an expression.
Modeled a little human to be in the plane, pretty cool. He is probably not even gonna show very well, but what the heck, modelling is fun


I added the poster as well the propeller and texture it.
Got the propeller going with an expression.
Modeled a little human to be in the plane, pretty cool. He is probably not even gonna show very well, but what the heck, modelling is fun


Monday, 10 June 2013
251 - Development
So after discussing ideas with Tim we decided to go with the infrared idea and create a website called Webulator, in which we would be able to use its buttons to control infrared receiving devices.
He came up with a very good design and after a bit of discussion we narrowed it down to the following design (which turned out pretty awesome):

He came up with a very good design and after a bit of discussion we narrowed it down to the following design (which turned out pretty awesome):


Sunday, 9 June 2013
251 - Development
After hours just failure and not getting anywhere I accidentally went through another one of Neri's tutorials in which he explained how to use the arduino to send infrared information to turn your TV on and off:
It seemed like a good path to head towards since I wasn't getting anywhere and it seemed really interesting and could very easily be related to our project.
It seemed like a good path to head towards since I wasn't getting anywhere and it seemed really interesting and could very easily be related to our project.
Saturday, 8 June 2013
251 - Development
I went through a lot of tutorials, most of them from this guy called Neri:
He explains pretty thoroughly how each code works, however, none of the tutorials I went through helped me figure out how to get the PHP code to read the arduino Serial.
After downloading a PHP terminal to try and have communication between both parties, I got the arduino to respond saying that it was getting data from the computer but never received it back on the computer.
This one tutorial explained the communication between the Arduino Serial and the computer as a black hole:
"In my previous post I discussed basics of serial communication between Arduino and PHP. Theory behind it is very simple. It all comes down to writing to a file. Simplicity of the serial communication paradoxically might contribute to confusion and surprising results. Serial device is like a black hole when you think about it. You send data inside but there is no feedback. You don’t know has your message arrived or not. You don’t know is your transmission going to be divided into multiple chunks or will arrive at one peace. There is no guarantee no feedback. On top of that there are some differences between operating systems and Arduino peculiarities. All of that combined together can confuse for a few hours or even discourage from the project."
Friday, 7 June 2013
251 - Development
In order to achieve what I wanted I had to buy this board:

Development 24
More driven keys!!1!1! Movement of the binoculars, the stretching of his rope, the rotation of the hook and the stretching of the boxes' ropes. I was also having trouble with his wings since I copied it as an instance, but managed to fix it with Szilards help.


Thursday, 6 June 2013
Development 23
Heliot's rig! A little bit painful but nothing major. Made the hook and rope move accordingly


Wednesday, 5 June 2013
251 - Development
My development with Project 2 was much different than in Project one. While in P1 I was constantly dealing physical materials and a lot of soldering, in P2 I was mainly dealing with arduino coding. Therefore, there isn't much to show apart from the code that I created.
I decided to do a group project with Tim Ng and explore how we would be able to use an arduino to manipulate a website.
The two main code examples that I used (from Arduino Library) were the WebServer and the WebClient:

The WebServer code would help me host my website and I thought that I could possibly have the arduino sending data to a PHP code. This way I'd be able to tell the PHP code to change according to any information sent to the arduino.

The WebClient is similar to the WebServer but completely different at the same time. This code would send information to a browser according to an existing server.
Development 22
Started playing with clouds and got them looking really good! They added a lot of rendering time but they looked so good it was worth it.


Tuesday, 4 June 2013
Development 21
Created driven keys for Heliots expressions and for the boxes size so that I could duplicate them and easily choose was size I wanted.


Monday, 3 June 2013

Sunday, 2 June 2013
Development 19
Steven taught me the basics of driven keys and I after doing it do my black hole doors I found out how amazing driven keys are and how useful! Started applying it to other objects as well to make my life easier.


Saturday, 1 June 2013
Development 18
Started creating the things on the second island. Door were pretty easy. The conveyor belt was quite tricky but by using a motion path as and an expression like the one I used for heliots inner workings it turned out great and easy to manipulate.


Subscribe to:
Comments (Atom)