Sunday, 29 September 2013

Respawning Animation

Craig suggested we have a re spawning animation so that our game looks cooool. So I started working on in. The process was kinda similar to drawing the explosion but much easier. I drew a yellow outline around the character fading into white and then played around with different shapes, a nice amount of frames for a build up.

This is how it turned out, I was stoked with the outcome:

This one has a little blink at the end just before it becomes the character

 photo 0_zps50fa7a5c.gif

This one is better as it smoothly fades into the character

 photo 1_zps9c9477be.gif

Friday, 27 September 2013

New Robot Explosion

So, a few times, making a new explosion was suggested. By tutors and friends. Michael was in charge of doing it because he has a really nice drawing style but he got a bit busy with his world map. I decided to do it since we really needed it. I recently got a drawing tablet and it was time I put it to good use. Here follows the development:

I found that explosions have a dark outline and fade into a very bright colour, where the explosion is actually happening. It was a bit tricky getting that nice aesthetic. I started using similar colours to real explosion.


Then I moved on to blue since the energy sphere that the character throws is blue.


Drew it several times until I really understood the core essence of the drawing.


Then I used the Warp tool from Photoshop to add little sharp explosions in it too.


This is how it turned out : D


 photo 4_Animation_zpse6775680.gif

Wednesday, 25 September 2013

Dying Animation

Next thing I worked on was a dying animation for Omnix. One where he falls through the screen, like many other 2D games. It was pretty easy to do, I just closed his eyes and made about 5 frames of his falling on back towards the groud.


 photo 0_zps7b7ed45c.gif

Monday, 23 September 2013

Robot Bullets

So Mohsin asked for me to work on some robot bullet, but he wanted me to make small ones so that the collision wasnt too big.

This is the bullet I first made for Fritz


And I made this optional one for any other robot it fit into, but I didnt end up suiting any other robot


But by flipping it 45 degrees we were able to use it for Reptar


After a while Mohsin said that Fritz's bullet was too small and player weren't realising what was killing them,
so I made this slightly bigger animated one

 photo 3_zps7be8c133.gif

Saturday, 21 September 2013

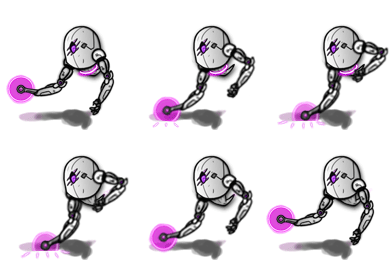
Robots Development - Reptar

This was my favorite one out of michaels robots. Reptar! Pretty much because of his foot. I love how organic it looks.

This was my first animation for reptar. I play a lot with his feet because it really added a unique look to him.
 photo 21_Reptar_0_zpsd012cb06.gif

The group was happy with it! But I wanted to do more. Then I improved his walking again.
 photo 22_Reptar_1_zpsc0268258.gif
Added left arm movement.
 photo 23_Reptar_2_zps0563f060.gif
I still thought there was something odd about his walking, it's easier to see in this slower version. So I decided to do it again.
 photo 24_Reptar_3_zps75ea267c.gif
And again.
 photo 25_Reptar_4_zpsf710f174.gif

Once I was happy with it I moved on to head movement. If you pay a lot of attention to this one, you'll notice that his head pops out of his body for 1 frame showing that his head is being held by his back pipes.
 photo 26_Reptar_5_zps47390e04.gif

Then I added movement to his right arm.
 photo 27_Reptar_6_zps9f38fb10.gif
After sorting out his Idle animation, it was time to decided about his future. What is reptar there for??? So I created an animation where he crouches to shoot afterwards.
 photo 28_Reptar_Crouch_0_zps3c3e3654.gif

I did it but I screwed it up a little bit, forgot about the back pipes, haha
 photo 29_Reptar_Crouch_1_zpsd3ad2e2a.gif

Did it again, but head moved at the end without the pipes moving.
 photo 30_Reptar_Crouch_2_zpsc6132bb7.gif

Did it again, but pipes moved too fast at the end /\
 photo 31_Reptar_Crouch_3_zpse8550314.gif

Did it again, it was fine, but arm was lifting too much. /\

So I finalized with this one \/
I was really happy with it
 photo 32_Reptar_Crouch_4_zpsa6b3dcfd.gif

And then shooting was pretty easy once I got him in the right position.
 photo 32_Reptar_Shooting_0_zps4dd3ed06.gif

And then added a triggering effect :] Done!
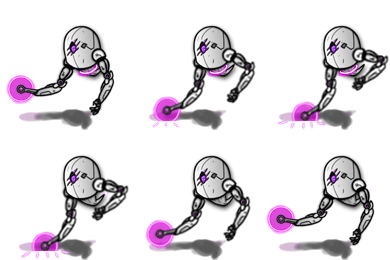
 photo 33_Reptar_Shooting_1_zpsc7169253.gif

Friday, 20 September 2013

Robots Development - Bumblebee

Same went for Bumblebee! I had already had a good idea of what to do after doing Kettle. A little bit different since bumblebee collects resources.

This was my very first animation for Bumblebee, where he is just collecting resources. Obviously, I wanted to develop it further.
 photo 4_Bumblebee_zpsa7761e3b.gif

Craig suggested it would be nice if I added a bit of a shake to his arm when he is cutting the ground, so I did that
 photo 5_Bumblebee_Arm_Shake_zps3246a0a6.gif

Mohsin said it would be cool if I made him an animation where he just lifts his arm from collecting resources to follow the player, so I did that. But his left arm was weird
 photo 6_Bumblebee_Arm_Lift_zps1fca1558.gif

I changed it but I think I went too far
 photo 7_Bumblebee_Arm_Lift_2_zpsc2594962.gif

Then I simplified it and it looked better
 photo 8_Bumblebee_Arm_Lift_3_zps58e1f587.gif

But then Mohsin said he expecting his arm to be higher so it looked more harmful and pressuring.
 photo 9_Bumblebee_Arm_Lift_4_zps855e77ce.gif

Then I also worked on an Idle animation for him just like Kettle's so that we could be two bumblebees with different personalities.
 photo 10_Bumblebee_Idle_zps72eeeb3a.gif

Shoulder movement
 photo 11_Bumblebee_Idle_2_zps919a558e.gif

Right forearm
 photo 12_Bumblebee_Idle_3_zpsa09dda77.gif

All together!
 photo 13_Bumblebee_Idle_4_zps58cae443.gif

Thursday, 19 September 2013

Robots Development - Kettle

Then I started working on Kettle, I learned a LOT by animating this one:


This is the first animation I ever made for him. It was just to have an idea. The left arm was looking weird and I didnt have the rings going.
 photo 14_Kettle_Attack_zps9d0f676d.gif
Then I changed it quite a bit and added the rings. The group was happy with the animation but they said it would also be nice we if had an animation where he is just idle, not just attacking the whole time... So here I go...
 photo 15_Kettle_Attack_Arm_Was_Weird_zps490cfa0a.gif

I tried this Idle out but it just looked so static and crap
 photo 16_Kettle_Idle_zps72b604de.gif

So I looked at heaps of examples and I decided to go for a new approach and try and move as much as I could from the character. First thing I sorted was the body movement.
 photo 16_Kettle_Idle_2_zpseb0b960a.gif

Then I added shoulders movement, but something went wrong with this one, it doesn't look right.
 photo 18_Kettle_Idle_4_Shoulders_Fail_zps137c1566.gif
So I fixed it.
 photo 17_Kettle_Idle_3_Shoulders_zps03accf29.gif
I added movement to both forearms as well which made it much better.
 photo 19_Kettle_Idle_5_Almost_There_zps1535d5a8.gif

Then the only thing left was to add the rings. And I was really satisfied with it! So was the group!
 photo 20_Kettle_Idle_6_Finished_zps2de8c4dc.gif

Wednesday, 18 September 2013

Robots Development - Fritz

So as michael was finishing his robot drawings (and they were looking so cool!), I started animating them asap.

This is Fritz:

I first did a shooting and cruising animation
 photo 0_Fritz_Shooting_zps837a318e.gif

Then the team told me it would be nice if he also had a just wandering around animation
 photo 1_Fritz_Idle_zpsd020dcb1.gif
After that we ran into some troubles with the code and we were struggling to get Fritz to shoot at the right time, so I made an animation where fritz just shoots down to make it easier... But I got the booster the wrong way around when I made this one -_- 
 photo 2_Different_Shooting_zps4b92b0eb.gif

So I fixed it :)
 photo 3_Different_Shooting_Fixed_zpsa41d4acf.gif

Sunday, 15 September 2013

Timelines

So the group seemed to be a little confused as to what they needed to get done by when, and what was it that they would have to do as a whole. I realized that instead of just giving them tasks based on what I wanted, I should sit down with them, go through the things I was expecting and let them create their own timeline.

We went through the things we needed to accomplish, the things we needed to establish, and also discussed about the narrative. So after doing some ugly writing, I made us each a nice uniquely colored PDF file with a clean explanation of our timelines: